Tuesday, January 24, 2012

"Custom" Framing


If you've ever had anything custom framed you know how shockingly expensive it is.  I've had this Map of Maui (purchased on my honeymoon) for almost 8 years now and I've shied away from having it framed because of this.  When my husband and I finally decided to decorate our bedroom I knew it was time for this map to find a home.  I almost bit the bullet and had it professionally framed but then it dawned on me "what if I could find a frame at a thrift store and just purchase the matting?"  Later in the week I went to a local thrift store and found "The Perfect Frame" for $20.00!  Here's how I customized it:

1.  I removed all the staples from the backing with a pair of pliers and some elbow grease.

2. I carefully removed the original artwork from the matting (which also happened to coordinate quite nicely with my map!)

3.  I went to my local Michael's and asked them to cut a custom mat to surround my map.  The man working in framing did this for me and charged me about $8 for the service, including the mat.  I am pretty sure this is not something they commonly do so you may want to call around to a few different locations to make sure they can and will do this for you.

4.  I took my mat home and taped my map into it.  Then I placed this into the frame and original matting and secured in place with tape.  I added a piece of cardboard behind the print and matting to help add some bulk and push the map up against the glass.

5. Lastly, I found my husbands staple gun and carefully stapled the backing back in place.  (Tip: Be sure glass is clean on the inside before performing this final step!)

Here is the result:


Let's do the math now:

Cost of Frame: $20.00
Cost of New Mat and Custom Cut: $8.00
Cost of Map: $25.00? (can't remember exactly, it was 8 years ago!)

Total Cost: $53.00

I'm guessing (based on past experience) that this would have cost me well over $200 to have custom framed.

Eco-friendly, budget friendly and beautiful = Happy Home-Maker!


French Fries


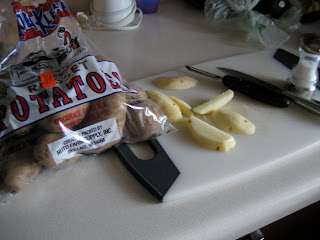
Today my son wanted French Fries for lunch which sounded good to me, too.  I had potatoes, olive oil and salt and thought I would attempt to fry my first ever batch from scratch.  They turned out fantastically and it was really super easy.  Here's how I did it:

1. Choose a wide shallow pan.  I used my wok.

2.  Put about 1/2" oil (I used olive) in the bottom of the pan.

3. Heat on MEDIUM heat for a few minutes.  This is where I set mine...


4. While oil is getting hot - wash, peel and cut potatoes into french fry shape (about 1/2" thick sticks.)


When oil is hot enough (if it's smoking it's, too hot!) CAREFULLY put a small amount of fries in.  (I used my spatula to put the fries into the hot oil.)  Oil should bubble vigorously.  PLEASE BE CAREFUL! 


Use your spatula to CAREFULLY turn the fries after a few minutes so they cook evenly.  When golden on all sides CAREFULLY remove from pan with spatula and place on a plate with a few paper towels on it to drain.  Add salt if desired and Enjoy when cool enough.


My 2 year olds lunch.  (He had a healthy breakfast and snack.)


My Lunch!  


My college roommate taught me to eat my fry's with mayo.  Thanks Kris!  Yum!


Pretty Little Pillow - DIY Slipcover


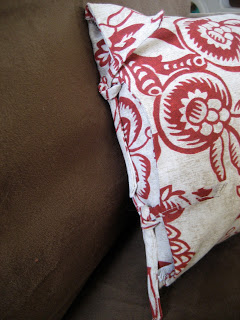
I Love Slipcovers.  They are such an easy way to add a punch of color and style to your home.  Plus, if your 2 and 5 year old decide to use them as napkins, you can just slip them off and throw them in the wash (just make sure to choose machine washable fabrics.)  Here's how I made this one:


Step 1: Make the Ties


Cut 4 - 1"x 6" pieces.


 Fold each of the long edges in to the center and iron.  Right side of the fabric will be on the outside.


Fold ONE short edge of each piece in about 1/4 inch and iron.


Fold in each side of this same edge to form a point (kinda like making a paper airplane.)


Fold the whole strip in half (be sure right side of fabric is out, still) and iron.


Using a straight stitch, sew ties closed (as close to the edge as possible.)  I started at the non-point end and only sewed to where the point started to dip.  I did not try sew all the way down to the point.  Be sure to back stitch the end near the point to lock stitching in place.  Yay, your ties are done, you can set them aside for a brief moment.


Step 2: Make the Slipcover


Cut 2 Large Rectangles the size of your pillow form PLUS 1 inch on each side.  My pillow insert was 10" x 15" so I cut my Large rectangles 11" x 16".  Cut your Small rectangles the same height as your large pieces and approximately 1/3 the width.  My small rectangles are 11" x  6"


Grab your ties.  Pin 2 ties onto each large rectangle, along 1 short edge, approximately 3" up from the corner. Your ties should be "pointing" in toward the center of the pillow with the short 1/4" edge matching up with the short edge of the large rectangle.  Like this...


Making sure the right sides of the fabric are facing each other, place your small rectangle on top of the large rectangle and ties that you just pinned so that the equal length edges of both the small and large rectangle match. Pin in place along this edge. Repeat with the other 2 rectangles.


Sew along this edge.  I used this stitch to prevent my fabric from unraveling and to double seem it for extra durability (remember, I have 2 boys.)


Flip the small rectangle over to reveal your sewn in ties!!! Your almost done!


Place both pieces right sides of the large rectangle fabric facing each other and pin in place along the 3 edges that do not have the ties on them.  The right sides of your small rectangles will be facing out.


Sew along the 3 edges you just pinned.  I used the same double seem zig zag stitch again.


Clip the 2 corners opposite the edge with the ties so they will form a better point when turned right side out.  Be carful not to cut your seem!


Turn your slipcover right side out.


Stuff with your pillow form and tie.


Admire.

Strategically place in cute location until your kids decide to throw it on the floor.