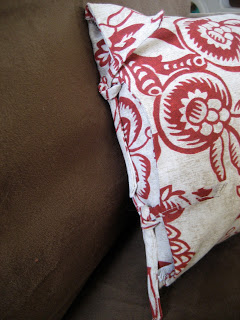
I Love Slipcovers. They are such an easy way to add a punch of color and style to your home. Plus, if your 2 and 5 year old decide to use them as napkins, you can just slip them off and throw them in the wash (just make sure to choose machine washable fabrics.) Here's how I made this one:
Step 1: Make the Ties
Cut 4 - 1"x 6" pieces.
Fold each of the long edges in to the center and iron. Right side of the fabric will be on the outside.
Fold ONE short edge of each piece in about 1/4 inch and iron.
Fold in each side of this same edge to form a point (kinda like making a paper airplane.)
Fold the whole strip in half (be sure right side of fabric is out, still) and iron.
Using a straight stitch, sew ties closed (as close to the edge as possible.) I started at the non-point end and only sewed to where the point started to dip. I did not try sew all the way down to the point. Be sure to back stitch the end near the point to lock stitching in place. Yay, your ties are done, you can set them aside for a brief moment.
Step 2: Make the Slipcover
Cut 2 Large Rectangles the size of your pillow form PLUS 1 inch on each side. My pillow insert was 10" x 15" so I cut my Large rectangles 11" x 16". Cut your Small rectangles the same height as your large pieces and approximately 1/3 the width. My small rectangles are 11" x 6"
Grab your ties. Pin 2 ties onto each large rectangle, along 1 short edge, approximately 3" up from the corner. Your ties should be "pointing" in toward the center of the pillow with the short 1/4" edge matching up with the short edge of the large rectangle. Like this...
Making sure the right sides of the fabric are facing each other, place your small rectangle on top of the large rectangle and ties that you just pinned so that the equal length edges of both the small and large rectangle match. Pin in place along this edge. Repeat with the other 2 rectangles.
Sew along this edge. I used this stitch to prevent my fabric from unraveling and to double seem it for extra durability (remember, I have 2 boys.)
Flip the small rectangle over to reveal your sewn in ties!!! Your almost done!
Place both pieces right sides of the large rectangle fabric facing each other and pin in place along the 3 edges that do not have the ties on them. The right sides of your small rectangles will be facing out.
Sew along the 3 edges you just pinned. I used the same double seem zig zag stitch again.
Clip the 2 corners opposite the edge with the ties so they will form a better point when turned right side out. Be carful not to cut your seem!
Turn your slipcover right side out.
Stuff with your pillow form and tie.
Admire.
Strategically place in cute location until your kids decide to throw it on the floor.


No comments:
Post a Comment